Image Borders with ActionScript 3
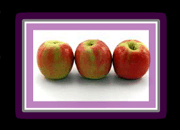
March 30, 2009 by: smonteIn this tutorial I’ll show you how to add awesome image borders to your images! The borders change according to the image size and we also add a random border color for each image. We will use ActionsScript 3 as usual. Click the stage to see the results (you can change the images by clicking the stage).
Note: You need TweenMax in order to complete this tutorial.
Setting up the environment
1. Create a new Flash ActionScript 3 document of size 550×400.
2. Download 4 images of your choice. Just make sure that your images fit on the stage! I downloaded the images from FreeDigitalPhotos.net.
3. From the menu select File -> Import -> Import to Library. Your library should now look like the following (the image names of course might be different).

4. Drag the first image to the stage and convert it to a movie clip. Name it “Image 1″ and set the registration point to the center.

5. Repeat step #4 for all the images in the library. Name the movie clips “Image 2″, “Image 3″ and “Image 4″. You should drop all the images to the same layer. Don’t worry about the positioning, we will handle that via ActionScript 3. Your library should now look like the following.

6. Give the images instance names of “image1″, “image2″ and so on.
7. Name the first layer images and create a new layer called border. Hide the images layer.

8. In the borders layer, draw a rectangle without any fill color. Use white for the stroke color and make it 4 pixels thick. You can make the rectangle any size you want, since we’ll animate the width and height later on with ActionScript.
9. Convert the rectangle to a movie clip named “Image Border”. Set the registration point to the center. My movie clip ended up looking like the following.

10. Give the rectangle an instance name of “imageBorder”.
Moving to ActionScript 3
11. Create a new layer for ActionScript and type the following.
//Import TweenMax (we use it for animation)
import gs.*;

//Save the center coordinates of the stage
var centerX:uint = stage.stageWidth / 2;
var centerY:uint = stage.stageHeight / 2;

//Let's add the images to an array
var imagesArray:Array = new Array(image1,image2,image3,image4);

//This variable will store the current image displayed
var currentImage:MovieClip = null;

//Make the border invisible at first
imageBorder.alpha = 0;

//Loop through the array elements
for (var i:uint = 0; i < imagesArray.length; i++) {

        //We want all the images to be invisible at the beginning
        imagesArray[i].alpha = 0;

        //Save the index of the image to a variable called "imageIndex"
        imagesArray[i].imageIndex = i;
}

//We listen when the user clicks the mouse on the stage
stage.addEventListener(MouseEvent.CLICK, stageClicked);

//This function is called when the user clicks the stage
function stageClicked(e:MouseEvent):void {

        //Check that the current image is not null
        if (currentImage != null) {

                //Animate the current image away
                TweenMax.to(currentImage, 1, {alpha:0});

                //Check to see if we are at the end of the imagesArray
                if (currentImage.imageIndex == imagesArray.length - 1) {

                        //Set the first image of the array to be our currentImage
                        currentImage = imagesArray[0];

                } else {
                        //We are not at the end of the array, so get the next image from the array
                        currentImage = imagesArray[currentImage.imageIndex + 1];
                }

        } else {
                //If the currentImage is null (= we just started the movie), we set the first image in the array
                //to be our current image.
                currentImage = imagesArray[0];

                //Set the border's alpha to 0.5
                imageBorder.alpha = 0.5;
        }

        //Position the current image and the border to the center of the stage
        currentImage.x = imageBorder.x = centerX;
        currentImage.y = imageBorder.y = centerY;

        //Animate the border's width and height according to the current image's dimensions.
        //We also a nice glow effect to the image border
        TweenMax.to(imageBorder, 0.5, {width: currentImage.width + 8, height: currentImage.height + 8,
        glowFilter:{color:Math.random() * 0xffffff, alpha:1, blurX:20, blurY:20, strength:100, quality:1}});

        //Animate the currentImage's alpha
        TweenMax.to(currentImage, 1, {alpha:1});
}
12. You are done, test your movie! I hope you enjoyed this Flash / ActionScript 3 tutorial. Feel free to post comments!
Download .fla
Related tutorials:
Comments
2 Responses to “Image Borders with ActionScript 3”Leave a Reply
You must be logged in to post a comment.


I don’t see where currentImage is defined. If I trace it it is always null?
Hi,
May I know if I just want to have a white line in 0.3px thick to be the border? I tried to make the thickness of the square smaller. But I do not know which part in the code I should change to make the other border cancel in your code.
Could you please let me know how to do it?